Part 1: Run a demo pipeline
In this first part of the Use nf-core training course, we show you how to find an nf-core pipeline and try it out using its built-in test profile.
We are going to use a pipeline called nf-core/demo that is maintained by the nf-core project as part of its inventory of pipelines for demonstration and training purposes.
Make sure your working directory is set to nfcore-use/ as instructed on the Getting started page.
1. Find and retrieve the nf-core/demo pipeline
Let's start by locating the nf-core/demo pipeline on the project website at nf-co.re, which centralizes all information such as: general documentation and help articles, documentation for each of the pipelines, blog posts, event announcements and so forth.
1.1. Find the pipeline on the website
In your web browser, go to https://nf-co.re/pipelines/ and type demo in the search bar.
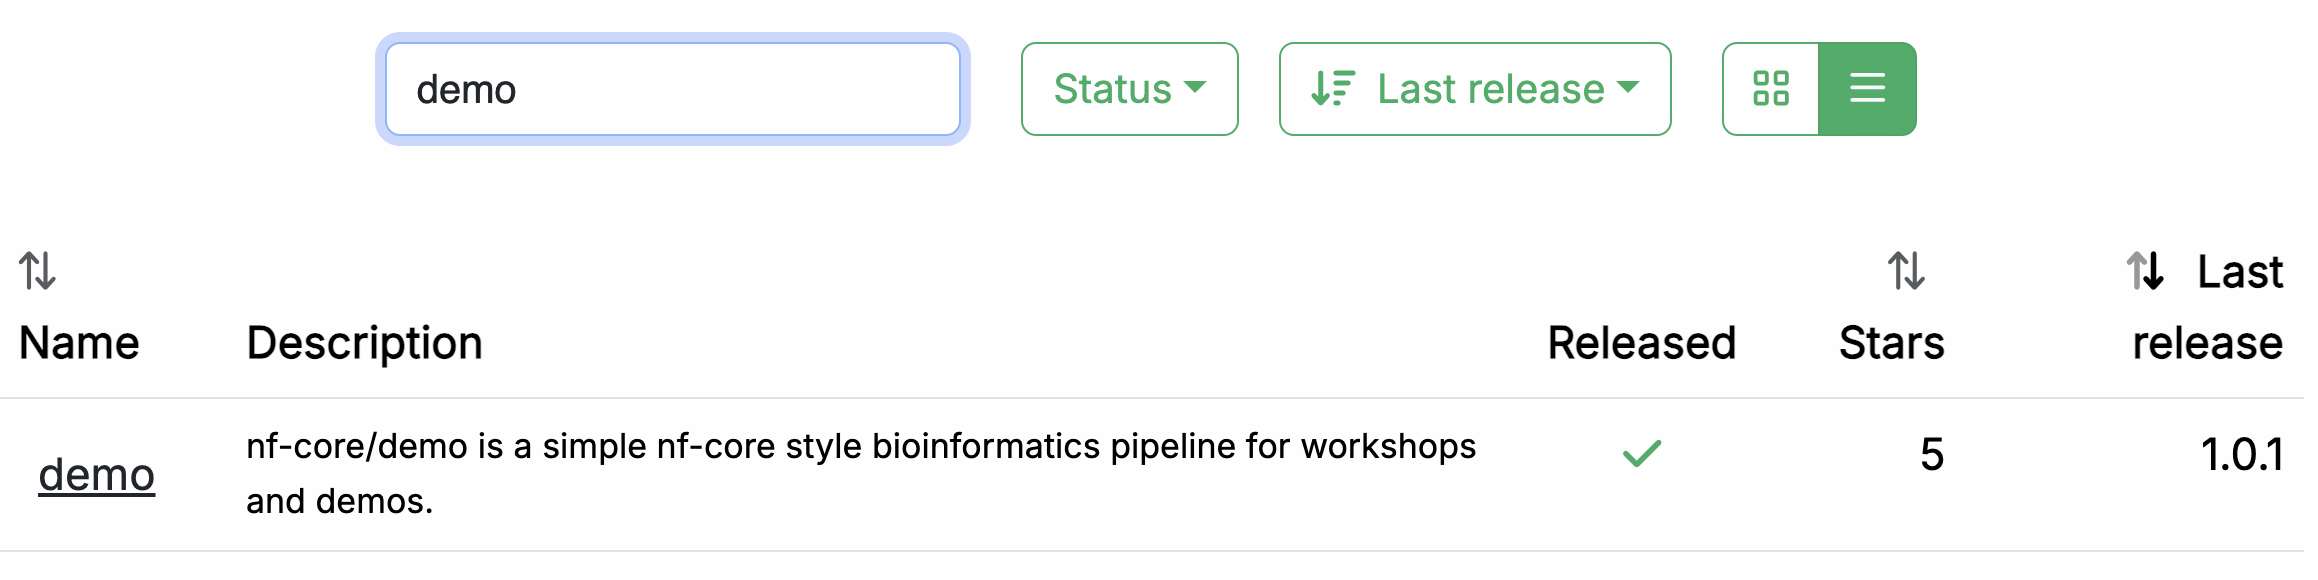
Click on the pipeline name, demo, to access the pipeline documentation page.
Each released pipeline has a dedicated page that includes the following documentation sections:
- Introduction: An introduction and overview of the pipeline
- Usage: Descriptions of how to execute the pipeline
- Parameters: Grouped pipeline parameters with descriptions
- Output: Descriptions and examples of the expected output files
- Results: Example output files generated from the full test dataset
- Releases & Statistics: Pipeline version history and statistics
Whenever you are considering adopting a new pipeline, you should read the pipeline documentation carefully first to understand what it does and how it should be configured before attempting to run it.
Have a look now and see if you can find out:
- Which tools the pipeline will run (Check the tab:
Introduction) - Which inputs and parameters the pipeline accepts or requires (Check the tab:
Parameters) - What are the outputs produced by the pipeline (Check the tab:
Output)
1.1.1. Pipeline overview
The Introduction tab provides an overview of the pipeline, including a visual representation (called a subway map) and a list of tools that are run as part of the pipeline.
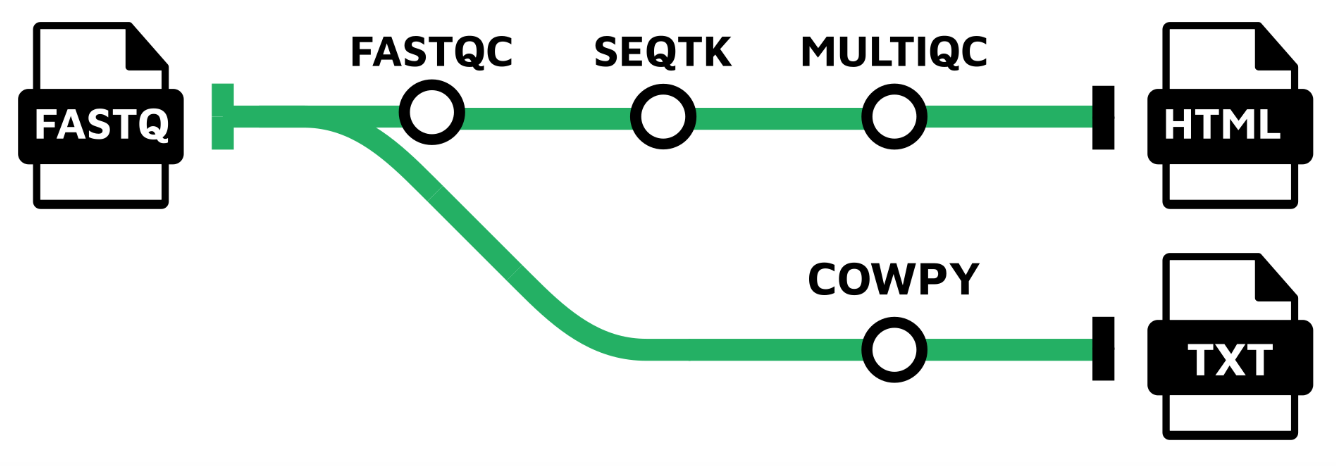
- Read QC (FASTQC)
- Adapter and quality trimming (SEQTK_TRIM)
- Present QC for raw reads (MULTIQC)
- Generate a lighthearted text message from a cow (COWPY)
1.1.2. Example command line
The documentation also provides an example input file (discussed further below) and an example command line.
nextflow run nf-core/demo \
  -profile <docker/singularity/.../institute> \
  --input samplesheet.csv \
  --outdir <OUTDIR>
You'll notice that the example command does NOT specify a workflow file, just the reference to the pipeline repository, nf-core/demo.
When invoked this way, Nextflow will assume that the code is organized in a certain way. Let's retrieve the code so we can examine this structure.
1.2. Retrieve the pipeline code
Once we've determined that the pipeline appears to be suitable for our purposes, let's try it out. Fortunately Nextflow makes it easy to retrieve pipelines from correctly-formatted repositories without having to download anything manually.
1.2.1. Use nextflow pull
Let's return to the terminal and run the following:
Command output
Nextflow does a pull of the pipeline code, meaning it downloads the full repository to your local drive.
To be clear, you can do this with any Nextflow pipeline that is appropriately set up in GitHub, not just nf-core pipelines. However nf-core is the largest open-source collection of Nextflow pipelines.
1.2.2. Use nextflow list
You can get Nextflow to give you a list of what pipelines you have retrieved in this way:
You can try pulling a few other pipelines to see how they get listed when you have more than one.
1.2.3. Find where the pipeline was downloaded
You'll notice that the files are not in your current work directory.
By default, Nextflow saves pulled pipelines under $NXF_HOME/assets.
To find where a specific pipeline lives, ask Nextflow directly:
Command output
 project name: nf-core/demo
 repository  : https://github.com/nf-core/demo
 local path  : /workspaces/.nextflow/assets/.repos/nf-core/demo
 main script : main.nf
 description : An nf-core demo pipeline
 revisions   :
   TEMPLATE
   bumper
   dev
   fix-nxfversion
   manually-merge-3_0_2
 > master (default)
   nf-core-template-merge-2.13.2.dev0
   nf-core-template-merge-2.14.0
   nf-core-template-merge-2.14.1
   nf-core-template-merge-3.0.0
   nf-core-template-merge-3.0.1
   nf-core-template-merge-3.0.2
   nf-core-template-merge-3.1.0
   nf-core-template-merge-3.1.2
   nf-core-template-merge-3.2.0
   nf-core-template-merge-3.2.1
   nf-core-template-merge-3.3.1
   nf-core-template-merge-3.3.2
   nf-core-template-merge-4.0.0
   nf-core-template-merge-4.0.3
   nf-core-template-merge-4.1.0
   nf-core-template-merge-4.1.0-2
   patch
   1.0.0 [t]
   1.0.1 [t]
   1.0.2 [t]
   1.1.0 [t]
 > 1.2.0 [t]
Info
The full path may differ on your system if you're not using our training environment.
Nextflow keeps the downloaded source code intentionally 'out of the way' on the principle that these pipelines should be used more like libraries than code that you would directly interact with.
Under the hood, Nextflow stores each pulled pipeline as a git repository under $NXF_HOME/assets/.repos/, and checks out the code for each revision into a clones/<commit>/ subdirectory.
Because .repos is a hidden directory, a plain tree -L 2 $NXF_HOME/assets/ will look empty.
1.2.4. Create a symlink to access the source code easily
We're not going to look at the code in detail, but let's take a quick peek just to get a sense of what the overall organization looks like.
To make it easier to browse the pipeline source code, create a symbolic link pointing at the checked-out copy of the pipeline:
mkdir -p pipelines/nf-core
ln -s "$(echo $NXF_HOME/assets/.repos/nf-core/demo/clones/*/)" pipelines/nf-core/demo
This creates a shortcut so you can explore the code with tree -L 2 pipelines/nf-core/demo or open files directly.
1.2.5. Overview of the code organization
You can either use tree or use the file explorer to find and open the nf-core/demo directory.
Directory contents
pipelines/nf-core/demo
├── assets
├── CHANGELOG.md
├── CITATIONS.md
├── CODE_OF_CONDUCT.md
├── conf
├── docs
├── LICENSE
├── main.nf
├── modules
├── modules.json
├── nextflow.config
├── nextflow_schema.json
├── nf-test.config
├── README.md
├── ro-crate-metadata.json
├── subworkflows
├── tests
├── tower.yml
└── workflows

7 directories, 12 files
As you can see, there's a lot going on in there, most of which you don't need to worry about.
Briefly, let's note that at the top level, you can find a README file with summary information, as well as accessory files that summarize project information such as licensing, contribution guidelines, citation and code of conduct.
Detailed pipeline documentation is located in the docs directory.
All of this content is used to generate the web pages on the nf-core website programmatically, so they're always up to date with the code.
For the rest, we can distinguish three functional groups of code files:
- Pipeline code components (
main.nf,workflows,subworkflows,modules) - Pipeline configuration
- Pipeline parameters / inputs and validation
We won't go over the pipeline code components in this part of the course, but we will touch on elements of configuration and validation that are likely to be relevant to you as an end user of nf-core pipelines.
Tip
You can also browse any nf-core pipeline's source code on GitHub, e.g. github.com/nf-core/demo. Every nf-core pipeline follows the same directory layout, so once you know the structure, you can find configuration files, modules, and workflows for any pipeline the same way.
For now, on to running the pipeline!
Takeaway
You now know how to find a pipeline via the nf-core website and retrieve a local copy of the source code.
What's next?
Learn how to try out an nf-core pipeline with minimal effort.
2. Try out the pipeline with its test profile
Conveniently, every nf-core pipeline comes with a test profile. This is a minimal set of configuration settings for the pipeline to run using a small test dataset hosted in the nf-core/test-datasets repository. It's a great way to quickly try out a pipeline at small scale.
Tip
Nextflow's configuration profile system allows you to easily switch between different container engines or execution environments. For more details, see Hello Nextflow Part 6: Configuration.
2.1. Examine the test profile
It's good practice to check what a pipeline's test profile specifies before running it.
The test profile for nf-core/demo lives in the configuration file conf/test.config.
You can find it locally inside the pipeline source that nextflow pull downloaded, via the pipelines symlink created in section 1.2.4:
Here is the content of that file:
You'll notice right away that the comment block at the top includes a usage example showing how to run the pipeline with this test profile.
| conf/test.config | |
|---|---|
The only things we need to supply are what's shown between carets in the example command: <docker/singularity> and <OUTDIR>.
As a reminder, <docker/singularity> refers to the choice of container system. All nf-core pipelines are designed to be usable with containers (Docker, Singularity, etc.) to ensure reproducibility and eliminate software installation issues.
So we'll need to specify whether we want to use Docker or Singularity to test the pipeline.
The --outdir <OUTDIR> part refers to the directory where Nextflow will write the pipeline's outputs.
We need to provide a name for it, which we can just make up.
If it does not exist already, Nextflow will create it for us at runtime.
Moving on to the section after the comment block, the test profile shows us what has been pre-configured for testing: most notably, the input parameter is already set to point to a test dataset, so we don't need to provide our own data.
If you follow the link to the pre-configured input, you'll see it is a csv file containing sample identifiers and file paths for several experimental samples.
sample,fastq_1,fastq_2
SAMPLE1_PE,https://raw.githubusercontent.com/nf-core/test-datasets/viralrecon/illumina/amplicon/sample1_R1.fastq.gz,https://raw.githubusercontent.com/nf-core/test-datasets/viralrecon/illumina/amplicon/sample1_R2.fastq.gz
SAMPLE2_PE,https://raw.githubusercontent.com/nf-core/test-datasets/viralrecon/illumina/amplicon/sample2_R1.fastq.gz,https://raw.githubusercontent.com/nf-core/test-datasets/viralrecon/illumina/amplicon/sample2_R2.fastq.gz
SAMPLE3_SE,https://raw.githubusercontent.com/nf-core/test-datasets/viralrecon/illumina/amplicon/sample1_R1.fastq.gz,
SAMPLE3_SE,https://raw.githubusercontent.com/nf-core/test-datasets/viralrecon/illumina/amplicon/sample2_R1.fastq.gz,
This is called a samplesheet, and is the most common form of input to nf-core pipelines. Don't worry if you're not familiar with the data formats and types, it's not important for what follows.
We now have everything we need to try out the pipeline.
2.2. Run the pipeline
As noted above, we can use the example testing command almost as-is; we just need to specify what software packaging to use, and what to name the output directory.
Here we'll use Docker for the container system and demo-results, respectively.
With that, we can run the test command:
Command output
 N E X T F L O W   ~  version 26.04.4

Downloading plugin nf-schema@2.7.2
Launching `https://github.com/nf-core/demo` [cranky_curry] revision: 32893afef8 [master]


------------------------------------------------------
                                        ,--./,-.
        ___     __   __   __   ___     /,-._.--~'
  |\ | |__  __ /  ` /  \ |__) |__         }  {
  | \| |       \__, \__/ |  \ |___     \`-._,-`-,
                                        `._,._,'
  nf-core/demo 1.2.0
------------------------------------------------------

Input/output options
  input                     : https://raw.githubusercontent.com/nf-core/test-datasets/viralrecon/samplesheet/samplesheet_test_illumina_amplicon.csv
  outdir                    : demo-results

Institutional config options
  config_profile_name       : Test profile
  config_profile_description: Minimal test dataset to check pipeline function

Generic options
  trace_report_suffix       : 2026-07-03_21-31-35

Core Nextflow options
  revision                  : master
  runName                   : cranky_curry
  containerEngine           : docker
  launchDir                 : /workspaces/training/nfcore-use
  workDir                   : /workspaces/training/nfcore-use/work
  projectDir                : /workspaces/.nextflow/assets/.repos/nf-core/demo/clones/32893afef8076a03a2767a020b3f0cab2e0b40b2
  userName                  : root
  profile                   : test,docker
  configFiles               : /workspaces/.nextflow/assets/.repos/nf-core/demo/clones/32893afef8076a03a2767a020b3f0cab2e0b40b2/nextflow.config

!! Only displaying parameters that differ from the pipeline defaults !!
------------------------------------------------------

* The pipeline
    https://doi.org/10.5281/zenodo.12192442

* The nf-core framework
    https://doi.org/10.1038/s41587-020-0439-x

* Software dependencies
    https://github.com/nf-core/demo/blob/master/CITATIONS.md

executor >  local (8)
[ca/5b0f3e] NFCORE_DEMO:DEMO:FASTQC (SAMPLE3_SE)     | 3 of 3 ✔
[b7/cb6812] NFCORE_DEMO:DEMO:SEQTK_TRIM (SAMPLE3_SE) | 3 of 3 ✔
[ff/6ebd98] NFCORE_DEMO:DEMO:COWPY                   | 1 of 1 ✔
[09/bbd1b4] NFCORE_DEMO:DEMO:MULTIQC (demo)          | 1 of 1 ✔
-[nf-core/demo] Pipeline completed successfully-
If your output matches that, congratulations! You've just run your first nf-core pipeline.
You'll notice that there is a lot more console output than when you run a basic Nextflow pipeline. There's a header that includes a summary of the pipeline's version, inputs and outputs, and a few elements of configuration.
Info
Your output will show different timestamps, execution names, and file paths, but the overall structure and process execution should be similar.
Notice the line near the top of the output:
This tells you which revision of the pipeline was used.
Because we did not specify a version, Nextflow used the latest commit on master.
For reproducible runs, you should pin a specific release using the -r flag:
This ensures that the same pipeline code is used every time, regardless of new commits or releases.
For this training we omit -r for simplicity, but in production you should always specify it.
Moving on to the execution output, let's have a look at the lines that tell us what processes were run:
executor >  local (8)
[ca/5b0f3e] NFCORE_DEMO:DEMO:FASTQC (SAMPLE3_SE)     | 3 of 3 ✔
[b7/cb6812] NFCORE_DEMO:DEMO:SEQTK_TRIM (SAMPLE3_SE) | 3 of 3 ✔
[ff/6ebd98] NFCORE_DEMO:DEMO:COWPY                   | 1 of 1 ✔
[09/bbd1b4] NFCORE_DEMO:DEMO:MULTIQC (demo)          | 1 of 1 ✔
-[nf-core/demo] Pipeline completed successfully-
This tells us that four processes were run, corresponding to the four tools shown in the pipeline documentation page on the nf-core website: FASTQC, SEQTK_TRIM, MULTIQC and COWPY.
The full process names as shown here, such as NFCORE_DEMO:DEMO:MULTIQC, are longer than what you may have seen in the introductory Hello Nextflow material.
These include the names of their parent workflows and reflect the modularity of the pipeline code.
If you want to learn to develop nf-core-style pipelines yourself, see the Build with nf-core course.
2.3. Examine the pipeline's outputs
Finally, let's have a look at the demo-results directory produced by the pipeline.
Directory contents
demo-results
├── cowpy
│   └── cowpy.txt
├── fastqc
│   ├── SAMPLE1_PE
│   ├── SAMPLE2_PE
│   └── SAMPLE3_SE
├── fq
│   ├── SAMPLE1_PE
│   ├── SAMPLE2_PE
│   └── SAMPLE3_SE
├── multiqc
│   ├── multiqc_data
│   └── multiqc_report.html
└── pipeline_info
    ├── execution_report_2026-07-03_21-31-35.html
    ├── execution_timeline_2026-07-03_21-31-35.html
    ├── execution_trace_2026-07-03_21-31-35.txt
    ├── nf_core_demo_software_mqc_versions.yml
    ├── params_2026-07-03_21-31-43.json
    └── pipeline_dag_2026-07-03_21-31-35.html

12 directories, 8 files
That might seem like a lot.
To learn more about the nf-core/demo pipeline's outputs, check out its documentation page.
At this stage, what's important to observe is that the results are organized by module, and there is additionally a directory called pipeline_info containing various timestamped reports about the pipeline execution.
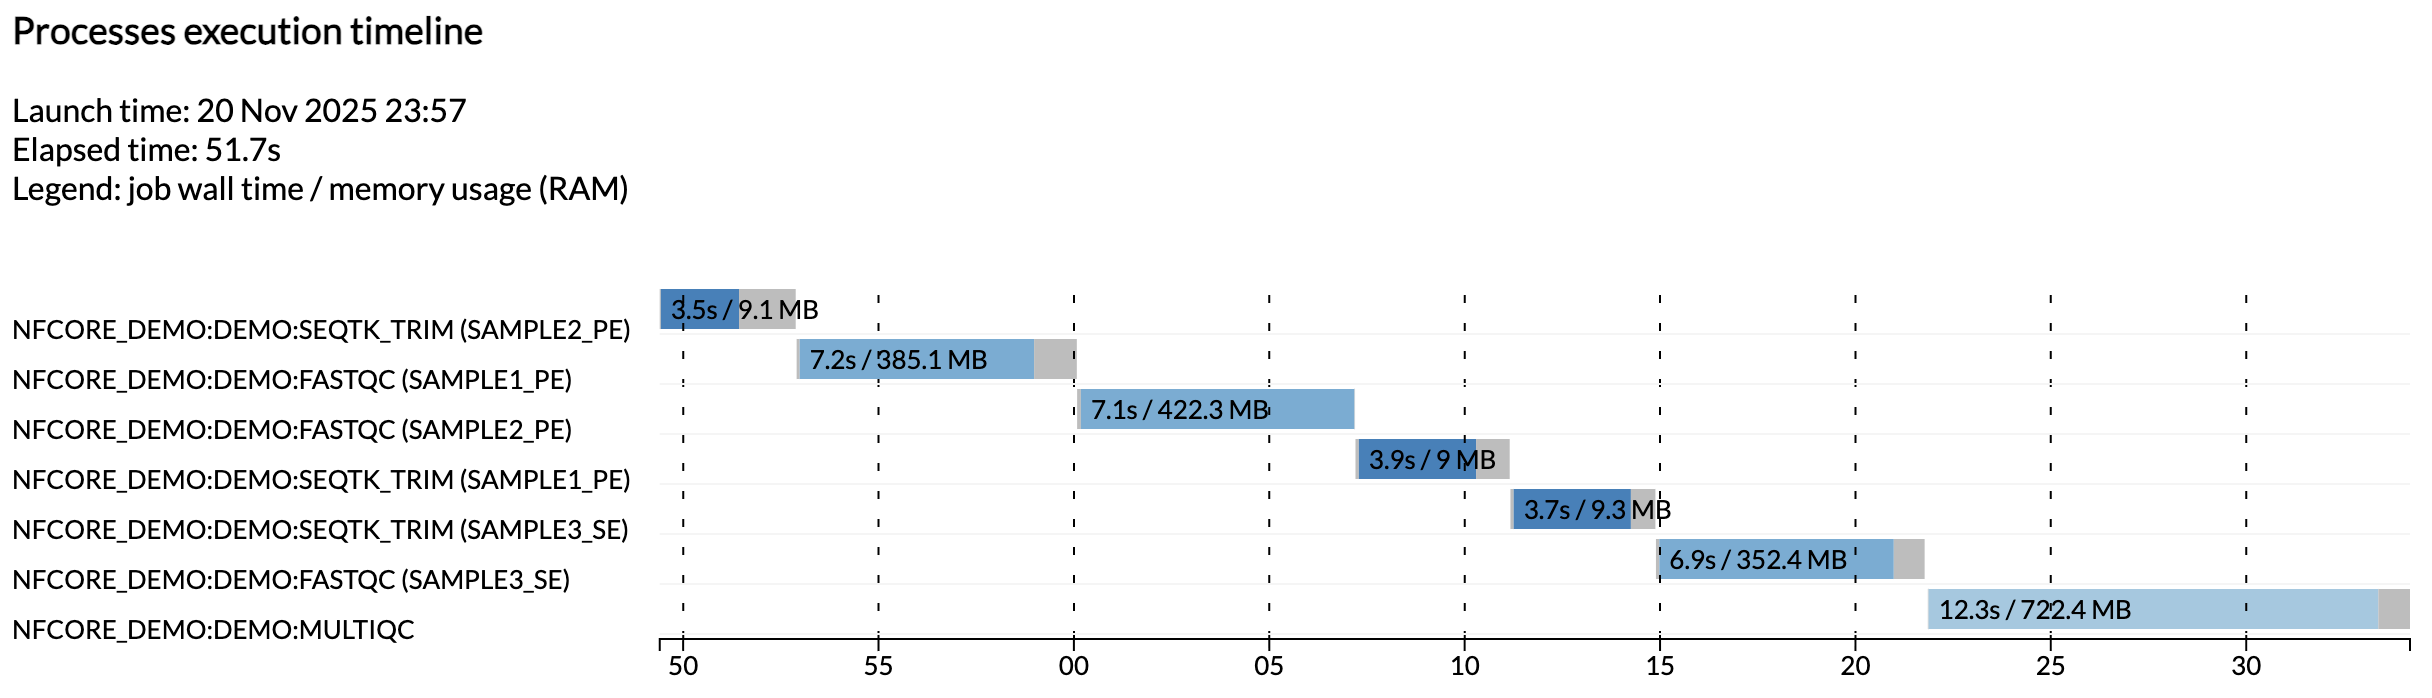
For example, the execution_timeline_* file shows you what processes were run, in what order and how long they took to run:
Info
Here the tasks were not run in parallel because we are running on a minimalist machine in Github Codespaces. To see these run in parallel, try increasing the CPU allocation of your codespace and the resource limits in the test configuration.
These reports are generated automatically for all nf-core pipelines.
Takeaway
You know how to run an nf-core pipeline using its built-in test profile and where to find its outputs.
What's next?
Head on to Part 2, where you'll learn how to configure pipeline execution.
Summary
In this part you learned to:
- Find and retrieve an nf-core pipeline and examine its code structure
- Run a pipeline using its built-in test profile